Friday, 12 April 2019

USA Lawyers Contacts And Email Database


                           Email me : immukesh72@gmail.com
 
Hi I can provide you USA lawyers database state wise from very popular website which include all area of practice of lawyers.

All data will be in xls/csv format with following columns.
  • Lawyers Full Name
  • Firm Name
  • Phone Number
  • Fax Number
  • Street Address
  • City
  • Region
  • Postal
  • Country
  • School
  • Degree
  • Graduation Year
  • Experience
  • About
  • Practice
  • Jurisdictions


Please ask me for sample data and quotations , email me : immukesh72@gmail.com

Sample Data Image:


             Email me : immukesh72@gmail.com

Indian Hospitals Contacts And Email Database


          Email me : immukesh72@gmail.com

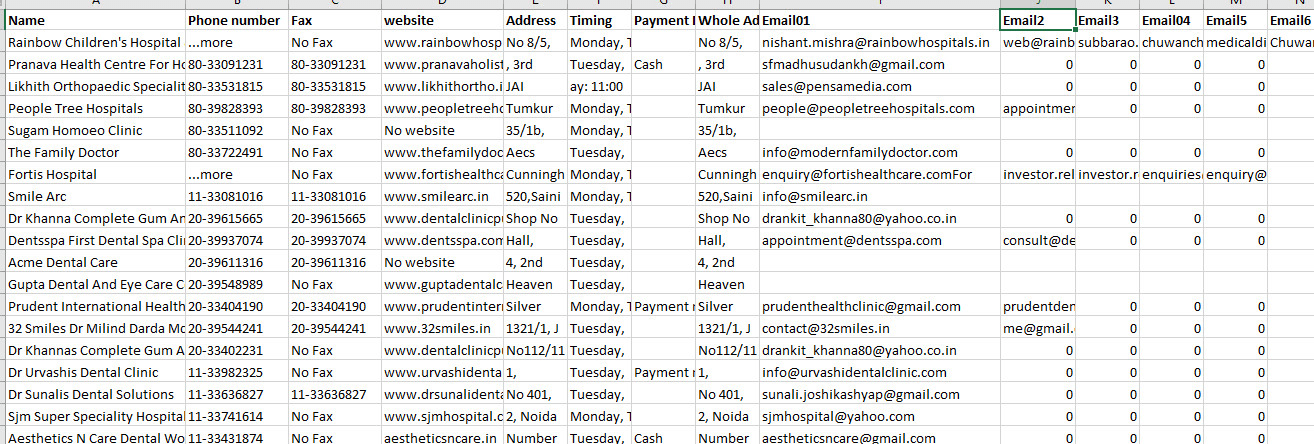
Hi I can provide you all Indian Hospitals or clinics database city wise more than 1 Lakhs records.
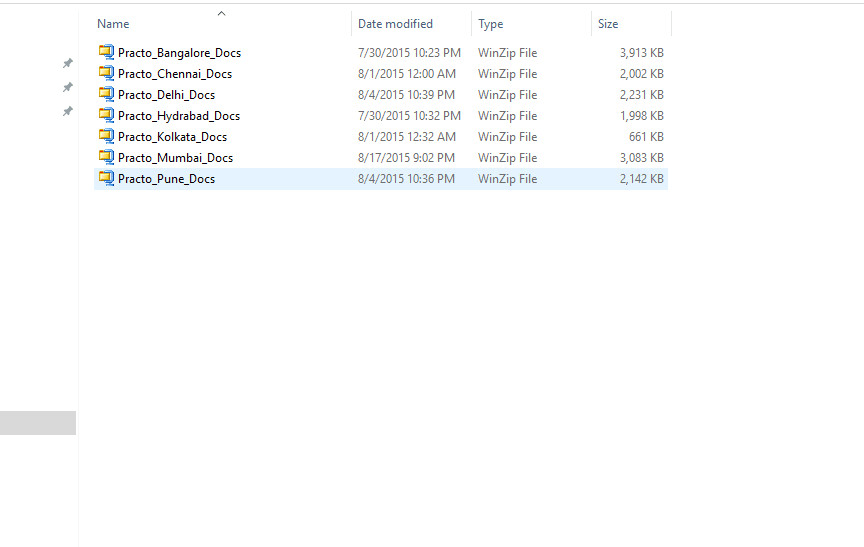
I can provide you data from Bangalore,Chennai,Delhi,Hyderabad,Kolkata,Mumbai,Pune,Noida and Gurgoan total one Lakhs records. 

All data will be in xls/csv format with following columns.

  • Name of hospital or clinic
  • Phone Number
  • Fax Number
  • Website
  • Address
  • Timing
  • Payment mode
  • Full Address
  • Email01
  • Email02,03,04

Please ask me for sample data and quotations , email me : immukesh72@gmail.com

Sample Data Image: 


        Email me : immukesh72@gmail.com


All India Doctors Database

Hello Friend,

                             Email Me : immukesh72@gmail.com


I can provide Indian doctors database from very popular Indian website in xls/csv format. We have total 64000 doctors details city wise. Please ask me for sample list and place the order. 
The following information are included:

  • Dr. Name
  • Specialties
  • Qualification
  • Reg Details
  • Membership
  • Address
  • Timing
  • Fees
  • Services offered
  • Awards and Certifications
  • Education-course
  • Experience
  • About Doctor

If you want quotation please email me at : immukesh72@gmail.com


                   Email Me : immukesh72@gmail.com


OCR Python Assignment Tasks

Task 1 : Compressing text

Develop a program that analyses a sentence that contains several words without punctuation. When a word in that sentence is input, the program identifies all of the positions where the word occurs in the sentence. The system should not be case sensitive: Ask, ask, ASK should be treated as the same word.

For example, in the sentence

"ASK NOT WHAT YOUR COUNTRY CAN DO FOR YOU ASK WHAT YOU CAN DO FOR YOUR COUNTRY"

The word ‘COUNTRY’ occurs in the 5th and 17th positions.

Analyze the requirements for this system and design, develop, test and evaluate a program to locate and return the position(s) of the word you have selected in a particular sentence or return an error message if the word is not in the sentence.

Task01 Description:


Please contact me at

immukesh72@gmail.com

for further assistance on such kind of assignments


Task 2 : Identifying Indivisual words in a sentence

Develop a program that identifies individual words in a sentence, stores these in a list and replaces each word in the original sentence with the position of that word in the list.
For example, the sentence

"ASK NOT WHAT YOUR COUNTRY CAN DO FOR YOU ASK WHAT YOU CAN DO FOR YOUR COUNTRY"
contains the words ASK, NOT, WHAT, YOUR, COUNTRY, CAN, DO, FOR, YOU
The sentence can be recreated from the positions of these words in this list using the sequence
1,2,3,4,5,6,7,8,9,1,3,9,6,7,8,4,5

Save the list of words and the positions of these words in the sentence as separate files or as a single file.
Analyse the requirements for this system and design, develop, test and evaluate a program to:
• identify the individual words in a sentence and store them in a list
• create a list of positions for words in that list
• save these lists as a single file or as separate files.


Please contact me at immukesh72@gmail.com  for further assistance on such kind of assignments.


Task 3 : Compress The Text File With Several Sentences

Develop a program that builds upon the technique from Task 2 to compress a text file with several sentences, including punctuation. The program should be able to compress a file into a list of words and list of positions to recreate the original file. It should also be able to take a compressed file and recreate the full text, including punctuation and capitalisation, of the original file.

Analyse the requirements for this system and design, develop, test and evaluate a program to compress a text file and reproduce the original text from a compressed file. You will need to create a text file with more than one sentence to test your system.

Requirements: Develop a program that builds upon the technique from Task 2 to compress a text file with several sentences, including punctuation. The program should be able to compress a file into a list of words and list of positions to recreate the original file. It should also be able to take a compressed file and recreate the full text, including punctuation and capitalization, of the original file.

Steps to develop above program:


Please contact me at

immukesh72@gmail.com

for further assistance on such kind of assignments

Wednesday, 22 November 2017

How to connect remote linux server from local linux server with ssh

Using the SSH protocol and by sharing the public key, you can connect and authenticate to remote servers and services. With SSH keys, you can connect to remote server from local server.
Let us consider we have 2 linux machine local server and remote server.

Step 1 . Check if you have already key pair 

Before starting let check if you have public and private in your local server for the user local-user.

[local-user@ip-xx-xx-xx ~]$ ls -l ~/.ssh
-rw-------. 1 local-user local-user  401 Nov 19 09:13 authorized_keys
-rw-------. 1 local-user local-user 3243 Nov 19 17:36 id_rsa
-rw-r--r--. 1 local-user local-user  743 Nov 19 17:36 id_rsa.pub
-rw-r--r--. 1 local-user local-user  803 Nov 19 17:32 known_hosts

If you able to see id_rsa and id_rsa.pub then that means you have already generated key pair otherwise you need to generate key pair.

Step 2. Generate the public and private key pair

Run the following command to generate the ssh key pair.

[local-user@ip-172-31-52-47 ~]$ ssh-keygen
Generating public/private rsa key pair.
Enter file in which to save the key (/home/local-user/.ssh/id_rsa):[ Hit Enter key ]
Created directory '/home/local-user/.ssh'.
Enter passphrase (empty for no passphrase):[ Hit Enter key ]
Enter same passphrase again:[ Hit Enter key ]
Your identification has been saved in /home/local-user/.ssh/id_rsa.
Your public key has been saved in /home/local-user/.ssh/id_rsa.pub.
The key fingerprint is:
SHA256:Pz5p8KbvF/kcgOTSak45/ZGkE5saGVLZD36U1okLtg4 local-user@ip-172-31-52-47.ec2.internal
The key's randomart image is:
+---[RSA 2048]----+
|         o   + . |
|        o ** = o |
|       . O .     |
|      . E B *    |
|       .SX xB +  |
|        X.B = .  |
|       + *o+ = . |
|        o.*.o o  |
|        .*+o     |
+----[SHA256]-----+

Now you will be able to see public and private key in the /home/local-user/.ssh/ directory.

Step 3 : Share the public key to remote server

Copy and install the public key using ssh-copy-id command

$ ssh-copy-id -i remote-user@<ip-address-of-remote-server>
    remote-user@<ip-address-of-remote-server> password:
   

Note : You can also direct copy the content of public key and pate into authorized_keys (~/.ssh/authorized_keys) file of remote server.
 
Step 4. Access remote server with SSH

Now try logging into the machine, with "ssh remote-user@<ip-address-of-remote-server>" from  local server with local-user.


******************** END ********************

Tuesday, 10 October 2017

5 ways to count the lines of a file in Linux

There are multiple ways to count the number of lines of a file in Linux. In our daily life we need to count number of lines of a csv file, text file etc and the most popular command we use "wc -l". In this article i will show you 5 different ways to find number of line along with wc -l


Let us consider we have 2 sample file name as sample1.txt and sample2.txt which having 10 and 3 lines as following. I will show you different examples to get the number of lines.

Contents of sample1.txt
[~]$ cat sample1.txt

One
Two
Three
four
five
six This is longest line
seven
eight
nine
ten

Contents of sample2.txt

[~]$ cat sample2.txt
One
Two Longest Line
Three

The wc (word count) command is very popular in Unix/Linux to find number of lines count, word counts, byte and characters count in a file. The syntax of wc command is as following.
wc  [OPTION]... [FILE]...

Where OPTION are as below:

  -c, --bytes            print the byte counts
  -m, --chars            print the character counts
  -l, --lines            print the newline counts
      --files0-from=F    read input from the files specified by
                           NUL-terminated names in file F;
                           If F is - then read names from standard input
  -L, --max-line-length  print the length of the longest line
  -w, --words            print the word counts

[~]$ wc sample1.txt sample2.txt

10 14 70 sample1.txt
 3  5 27 sample2.txt
13 19 97 total

In the above example first column shows number of line , 2nd column shows words and 3rd column shows number of chars. Last row shows the total counts of all files.

Lets us have a look of different ways to find the number of lines in a file , we will use sample1.txt in our demo.

1) Counting lines with WC command

[~]$ cat sample1.txt | wc -l
10
or
[~]$ wc -l sample1.txt
10 sample1.txt

2) Counting lines with sed command
sed uses "=" operator for line numbering and "$" gives the last count of numbering which is total number of lines.
[~]$ sed -n "$=" sample1.txt
10

3) grep command with -c option:

To count all non-empty lines or non-blank line.
[~]$ grep -c "." sample2.txt
3
To count all line including blank or empty lines.
[~]$ grep -c ".*" sample2.txt
4
or
[~]$ grep -c "^" sample2.txt
4

4). Counting line with awk:

awk with NR variable gives the line numbers and by printing NR with the end block it gives the line number of the last line which is nothing but a total number of lines in file.
[~]$ awk 'END {print NR}' sample1.txt
10

5). Counting lines with perl:

End block as in awk we can use also with perl. In Perl "$." gives the number of lines.
[~]$ perl -lne 'END {print $.}' sample1.txt
10

Note:

To find the longest line character count we can use wc with -L option. As shown below in sample1.txt file the longest line having 24 character where as in sample2.txt it is 16.
[~]$ wc -L sample1.txt sample2.txt
24 sample1.txt
16 sample2.txt
24 total

Have a look on couple of heck of counting lines.

Trick 01:
cat -n sample1.txt | tail -n 1 | cut -f1

Explanation : "cat -n sample1.txt" keeps a number line in file and pipe "tail -n1" gives the first row from bottom which includes line number and last line content. Then pipe "cut -f1" take out the first field of last line(last line number) which is nothing but the total count of lines.

Trick 02:

Using the while loop reading file line by line and increasing counter.

#!/bin/bash

count=0
while read
do
  ((count=$count+1))
done <sample1.txt

echo $count


***End***

Saturday, 7 October 2017

Split command in Linux/Unix

Split command is very useful when you are managing large file . Consider you have a csv file with millions of records and its taking too much time to open. In this case we can split file into small pieces and can access it easily in any GUI.


The default size for each split file is 1000 lines, and default PREFIX is "x". However we can split file based of number of lines or bytes and can change the prefix as well. In this article i will show you how to use split command with examples.

Let us consider we have a file testfile.csv with 1342 records.
[~]$ cat testfile.csv | wc -l
1342

1). Split simple example :

As you can see below split command split file testfile.csv in 2 pieces with default prefix x. testfile.csv file having total 1342 records hence by default it split first file name as xaa with default 1000 line and second file name as xab with remaining records 342.
[~]$ split testfile.csv

[~]$ ls
testfile.csv  xaa  xab

[~]$ cat xaa | wc -l
1000

[~]$ cat xab | wc -l
342

2) Split file with specific number of lines:

We can use -l option with split command to achieve specific number of line into split files. Let us we want to split file with 500 records for each then use following command.
[~]$ split -l 500 testfile.csv

[~]$ ls
testfile.csv  xaa  xab  xac

[~]$ cat xaa | wc -l
500

[~]$ cat xab | wc -l
500

[~]$ cat xac | wc -l
342

3) Split file with a specific prefix:

If we want to use our own prefix  "NEW" in split files use the following command.
[~]$ split -l 500 testfile.csv NEW

[~]$ ls
NEWaa  NEWab  NEWac  testfile.csv

4) Split file with numeric suffix:

We can append our own numeric suffix like 00,01,02... instead default xa,xb,xc .... with -d option as following.
[~]$ split -l 50 -d testfile.csv NEW

[~]$ ls
NEW00  NEW02  NEW04  NEW06  NEW08  NEW10  NEW12  NEW14  NEW16  NEW18  NEW20  NEW22  NEW24  NEW26
NEW01  NEW03  NEW05  NEW07  NEW09  NEW11  NEW13  NEW15  NEW17  NEW19  NEW21  NEW23  NEW25  testfile.csv

By default numeric suffix has 2 digits and you may need to increase the number of digits if split files crossing more than 100 files. In that case you will get following "suffixes exhausted" message and you may loose some split files after NEW99.
[~]$ split -l 10 -d testfile.csv NEW
split: output file suffixes exhausted

[~]$ ls
NEW00  NEW05  NEW10  NEW15  NEW20  NEW25  NEW30  NEW35  NEW40  NEW45  NEW50  NEW55  NEW60  NEW65  NEW70  NEW75  NEW80  NEW85  NEW90  NEW95  testfile.csv
NEW01  NEW06  NEW11  NEW16  NEW21  NEW26  NEW31  NEW36  NEW41  NEW46  NEW51  NEW56  NEW61  NEW66  NEW71  NEW76  NEW81  NEW86  NEW91  NEW96
NEW02  NEW07  NEW12  NEW17  NEW22  NEW27  NEW32  NEW37  NEW42  NEW47  NEW52  NEW57  NEW62  NEW67  NEW72  NEW77  NEW82  NEW87  NEW92  NEW97
NEW03  NEW08  NEW13  NEW18  NEW23  NEW28  NEW33  NEW38  NEW43  NEW48  NEW53  NEW58  NEW63  NEW68  NEW73  NEW78  NEW83  NEW88  NEW93  NEW98
NEW04  NEW09  NEW14  NEW19  NEW24  NEW29  NEW34  NEW39  NEW44  NEW49  NEW54  NEW59  NEW64  NEW69  NEW74  NEW79  NEW84  NEW89  NEW94  NEW99

To overcome this you can increase number of digits in suffix by using -a option as following.
[~]$ split -l 10 -a 3 -d testfile.csv NEW

[~]$ ls
NEW000  NEW007  NEW014  NEW021 .........  NEW099  NEW100  NEW101  .........  NEW132

5) Split file with 4000 bytes output:

We can use -b option with desired number of size.
[~]$ split -b4000 testfile.csv
              (or)
[~]$ split -b4k testfile.csv

[~]$ ls -ltr x*
-rw-rw-r-- 1 mukesh mukesh 3888 Oct  7 21:14 xae
-rw-rw-r-- 1 mukesh mukesh 4096 Oct  7 21:14 xad
-rw-rw-r-- 1 mukesh mukesh 4096 Oct  7 21:14 xac
-rw-rw-r-- 1 mukesh mukesh 4096 Oct  7 21:14 xab
-rw-rw-r-- 1 mukesh mukesh 4096 Oct  7 21:14 xaa

6) Split file with 2 files of equal length:

We can use -n option in place of -l as following to achieve specific number of file of same records.
[~]$ split -n 2 -d testfile.csv NEW

[~]$ ls
NEW00  NEW01  testfile.csv

[~]$ cat NEW00 | wc -l
670

[~]$ cat NEW01 | wc -l
672

[~]$ cat testfile.csv | wc -l
1342

In above example the expected count should be 671 into each NEW00 and NEW01 but its not. If anyone could explain me it would be appreciated.

***End***

What is Dark Web , Deep Web And Surface Web ?

Friends, We all use internet daily. Did you you know that there is a very big section of internet which you would never use? Today I will tell you about those sections which are Deep Web and Dark Web.
Internet is divided in to 3 sections or you can say layers, Surface Web, Deep Web and Dark Web.
Every one of you might know about Surface Web Internet, if not I will tell you about it today.


SURFACE WEB

It is the internet which is used most commonly by everyone in the world, and will be using in future and even which I use.That is called as Surface Web, in fact this video which you are watching now is also a part of Surface Web. Surface Web is the internet which is accessible anywhere in the world without any special permission, And Information about Surface Web is easily accessible in a simple Google search. That means all the information you get in Google search results such as links
or websites are all part of Surface Web because it is publicly available for everyone. For example, all your Entertainment Websites, News Websites, Music Websites, Torrents, and all the information you were using till today is all part of Surface Web. But do you really know that Surface Web is only 5% of actual internet? According the recent studies nearly 95% of internet is on Deep Web, if you compare Deep Web to Surface Web with an Ice Berg then Surface Web is just a tip which is seen in the sea which you were using it till now and will be using in future. But actual mass below is the Deep Web.

DEEP WEB :

Now let’s see what happens in Deep Web and what is stored in it. All online storage like Google Drive, Dropbox, Big University Documents, Research Data, Big Companies and Banks Information & Databases, Government Secret Projects & Files or basically the data which you will never get with a simple Google search are stored in Deep Web. If you want to access Deep Web, you will need a special URL, special address for website or server and you need permission to access that information. It might be a login id and password or any type of authentication, but without that address you will never be able to access the Deep Web. All the websites or web pages, data, information are not indexed by Google, Yahoo or Bing search engine, so in that case you will never be able to see what is stored in my normal Google drive or cloud storage even if you keep searching for it forever. It is accessible only if you have permission for that particular file or folder when shared. We need Deep Web to store all our data to cloud but don’t want to share it with everyone and only to the eligible ones. Its as simple as a company intranet page whereas project document would be shared only with the selected users or employees , but not with all employees and the same is not available on internet search. Deep Web is anyways not a hidden Internet all together, But there is another layer of internet which is hidden from everyone and that is called as Dark Web.

DARK WEB

This is just information we are providing about Dark Web, I request you or either warn you that usage of Dark Web is completely illegal, so never use it. Dark Web is the internet where you can do anything, for example Drugs Trading, Drugs Smuggling, Arms Trading, Arms Smuggling, all other illegal activities which we don’t want to discuss about. We just want to inform you that Dark Web is a Black Stop for Internet where you can do anything and everything, and also this is never shown in any simple search results. If you want to use it, then you will need a special browser called as Onion Router also known as Tor Browser. Dark web can be accessed using Tor Browser through a VPN, but I remind you that this is completely illegal. All the black market can be accessed in Dark Web since it uses Tor Browser which will be bouncing your address all over the world with different notes, only those users can trace you. Currently there is no back trace available for Tor Browser. It was invented for US Navy but nowadays Tor Network is there all over the world connecting entire black market
and many agencies are working to take down the websites in Dark Web as well. Even after all these corrective & preventive techniques, Dark Web still exists in the current Internet and there are lot of
illegal stuff and activities happening which is accessible only on Tor Browser.


**** END ****

Saturday, 30 September 2017

Cron Job In Linux | Scheduling job with crontab in Linux

Cron job are used to schedule commands to be executed periodically. You can setup commands or scripts, which will repeatedly run at a set time. Cron is one of the most useful tool in Linux or UNIX like operating systems. The cron service (daemon) runs in the background and constantly checks the
/etc/crontab file, and /etc/cron.*/ (cron.d/,cron.daily/,cron.hourly/,cron.monthly/,cron.weekly/) directories. It also checks the /var/spool/cron/ directory. Each user can have their own crontab file.

Other than crontab there are 2 more services to schedule the job the "at" command and "batch" command. The "at" command is used to schedule a one-time task at a specific time. The batch command is used to schedule a one-time task to be executed when the systems load average drops below 0.8.

Install or create or edit my own cron jobs:

To edit your crontab file, type the following command at the UNIX / Linux shell prompt:

$ crontab -e

Syntax of crontab (field description)

The syntax is:

    1 2 3 4 5 /path/to/command arg1 arg2

OR

    1 2 3 4 5 /root/backup-script.sh

Where,

1: Minute (0-59)
2: Hours (0-23)
3: Day (0-31)
4: Month (0-12 [12 == December])
5: Day of the week(0-7 [7 or 0 == sunday])

/path/to/command - Script or command name to schedule

Easy to remember format:


Examples of Run backup cron job script:
If you wish to run a backup-script.sh daily at 2.00 AM then first install your cronjob by running the following command as following .
$ crontab -e
append the following entry at the end
0 2 * * * /root/backup-script.sh

save and close the crontab file . The backup-script.sh will run every day at 2.00 AM.

More examples:
To run /path/to/script.sh every 5 min , Enter following command:
*/5 * * * * /path/to/script.sh

To run /path/to/script.sh five minutes after midnight, every day, Enter following:
5 0 * * * /path/to/script.sh

To run /path/to/script.sh at 3:15 PM on the first of every month, Enter following:
15 14 1 * * /path/to/script.sh

To run /path/script.sh at 10 PM on weekdays(Mon,Tue,Wed,Thu,Fri), Enter following:
0 22 * * 1-5 /scripts/script.sh

To run /path/myscripts/script.pl at 23 minutes after midnight, 2am, 4am ..., everyday, Enter:
23 0-23/2 * * * /path/myscripts/script.pl

How do I use operators?

An operator allows you to specifying multiple values in a field. There are four operators:

The asterisk (*) :

This operator specifies all possible values for a field. For example, an asterisk in the hour time field would be equivalent to every hour or an asterisk in the month field would be equivalent to every month.

The comma (,) :

This operator specifies a list of values, for example: "1,5,10,15,20, 25".

The dash (-) :

This operator specifies a range of values, for example: "5-15" days , which is equivalent to typing "5,6,7,8,9,....,13,14,15" using the comma operator.

The separator (/) :

This operator specifies a step value, for example: "0-23/" can be used in the hours field to specify command execution every other hour. Steps are also permitted after an asterisk, so if you want to say every two hours, just use */2.

How To Send Email From Linux Command Line

In Linux the mail command is an essential in our practical life. There is lot of instance when we want to send mail from Unix/Linux server to our outlook or personal email inbox. For example in Linux server we have generated csv file from database and want to pull this in our window machine. In this case we can use mail command to send file in our mailbox direct from Linux rather using FTP to pull report in local window machine.


Also mail command is useful in our automation script in which we want to generate some kind of report and send to its in recipients email box.

Before starting we should make sure we have installed mailx command in our system. If not installed run the following commands.

# For ubuntu/debian
$ sudo apt-get install heirloom-mailx

# For fedora/centos
$ sudo yum install mailx

Usage of mail command:
Once installation done you are ready to use mail command from command line. Following are the couple of examples .

1. Simple mail :
Run the following command and hit enter then you can write message for email body and for new line just hit enter and write message.
Once message complete press Ctrl+D and it would display EOT at the end.

Check the below message in recipient email if you not getting mail in inbox then check in spam/junk folder.

$ mail -s "This is subject" xyz@example.com
Hi there
This is a simple email body
bye!
EOT

2. Redirect message into mail from a file:

We can send email body message from a file by redirecting file as following.
$ mail -s "This is subject" xyz@example.com < /home/mukesh/message/message-body.txt
3. Message body in echo :

We can write the body message with echo as following.
$ echo -e "This is message body \nHere is second line." | mail -s "This is subject" xyz@example.com
4. Send mail to multiple recipients:

To send email to multiple recipient just separate the email id's  by comma.
echo -e "This is message body \nHere is second line." | mail -s "This is subject" xyz@example.com,abc@example.com
5. Using CC and BCC option:

Use -c to add CC and -b to add BCC
$ echo -e "This is message body" | mail -s "This is subject" -c ccrecipient@example.com xyz@example.com

$ echo -e "This is message body" | mail -s "This is subject" -c ccrecipient@example.com -b bccrecipient@example.com xyz@example.com
6. Specifying from Email:
If you wish to put sender email for recipient use -r option as following.

$ echo "This is message body" | mail -s "This is Subject" -r "Mukesh<fromemail@example.com>" recipient@example.com
7.Email with attachment ( Important ):

To attach  file use -a option as following.
echo "This is Message Body" | mail -s "This is Subject" -a /home/mukesh/message/sampleFile.csv recipient@example.com

echo "This is Message Body" | mail -s "This is Subject" -r "Mukesh<fromemail@example.com>" -a /home/mukesh/message/sampleFile.csv recipient@example.com


**** End****

Wednesday, 20 September 2017

How to find the length of a string variable in UNIX.

You may need to find the length of string or size of string variable in your shell script program. Here are the 5 best ways through which you can acheive it.


Above picture may clear you whole story if not please go in details as following.


Consider we have a variable name VAR and it stores a string "Hello" which length is 5.
VAR="Hello"

1) echo : In the bash we can use echo command as following .
VAR="Hello"
echo ${#VAR}
5

2) echo with wc : Second method is echo with wc with -c option as following.
VAR="Hello"
echo -n $VAR | wc -m
5

or

echo -n $VAR | wc -c
5
Note:
Where -m print the character counts and -c print the byte counts .

3) printf with wc : 3rd method is to use printf with wc as following.
printf $VAR | wc -c
5

or

printf $VAR | wc -m
5

4) echo with awk : 4th method is echo with awk as following.
echo $VAR | awk '{print length ;}'
5

5) expr : 5th method to use expr as following.
expr length $VAR
5

or

expr $VAR : '.*'
5
Watch video in detail


Thursday, 31 August 2017

How to make a shell script work like a UNIX command


In this article i will tell you "How to run shell script from any location like an Unix command" or "How to run scripts without typing the full path"

As we know that we can run unix command at unix terminal from any location and we dont bother where this command script is located into system.
But when we write our own script we have to give a proper path to the script or we need to go to the script location to run it.

For example if we have a test script demo under /home/mukesh/Desktop , then if you want to run script you need to change directory to script path /home/mukesh/Desktop or you need to give a complete path /home/mukesh/Desktop/demo

Let us see how can run demo script from anywhere or from any location on linux/unix terminal.

Consider a sample script name "demo" as at following location and content.
mukesh@ubuntu:~/Desktop$ pwd
/home/mukesh/Desktop

mukesh@ubuntu:~/Desktop$ cat demo
#!/bin/bash

echo "Hello, this is demo script"

mukesh@ubuntu:~/Desktop$ ./demo
Hello, this is demo script


Following are the steps to make your script like an Unix command.

1). Create a directory bin under your home directory.
2). Place your shell script file in this bin directory.
3). Update the PATH variable.
        PATH=$PATH:~mukesh/bin   (where: mukesh is my username, you can keep your own username)
       
Once done move the script "demo" to your "/home/mukesh/bin" directory and then you would be able to run script from any where . Lets try to run demo script from Documents directory /home/mukesh/Documents

mukesh@ubuntu:~/Documents$ demo
Hello, this is demo script

Like wise you can keep any number of script in bin directory "/home/mukesh/bin" and able to run like an unix command.


Note:
You can create any other directory name also other than "bin" but in that case you may need to make an entry in .bashrc file.
Consider if you want to create a directory "testDir" in place of "bin" then just vi the .bashrc file and place the following line at the end of file and save.
export PATH="/home/mukesh/testDir:$PATH


Wednesday, 31 May 2017

How To Install NRPE On Redhat or CentOS Linux Server


Need personal assistance on Nagios? Please contact me at

immukesh72@gmail.com

at very nominal charges

Step 01: Install NRPE Plugins in Nagios monitoring host

wget http://downloads.sourceforge.net/project/nagios/nrpe-2.x/nrpe-2.15/nrpe-2.15.tar.gz

tar -zxvf nrpe-2.15.tar.gz

cd nrpe-2.15

./configure --enable-command-args --with-nagios-user=nagios --with-nagios-group=nagios --with-ssl=/usr/bin/openssl --with-ssl-lib=/usr/lib/x86_64-linux-gnu

Now build and install NRPE and its xinetd startup script with these commands:
make all
sudo make install
sudo make install-xinetd
sudo make install-daemon-config
  
Step 01: On client server that you want to monitor, install the EPEL repository:
    NRPE packages and plugins are available under epel yum repository
sudo yum install epel-release
or
rpm -Uvh http://download.fedoraproject.org/pub/epel/6/x86_64/epel-release-6-8.noarch.rpm
RPM (Red Hat Package Manager) is an default open source and most popular package management utility for Red Hat based systems like (RHEL, CentOS and Fedora). The tool allows system administrators and users to install, update, uninstall, query, verify and manage system software packages in Unix/Linux operating systems.
   
Now install Nagios Plugins and NRPE:
yum --enablerepo=epel -y install nrpe nagios-plugins
update private IP address of your Nagios server in allowed host
sudo vi /etc/nagios/nrpe.cfg
allowed_hosts=127.0.0.1,10.132.224.168

Add new commands or update existing commands like below in same file.
 command[check_root_disk]=/usr/lib/nagios/plugins/check_disk -w 20% -c 10% -p /
 command[check_load]=/usr/lib/nagios/plugins/check_load -w 15,10,5 -c 30,25,20
Step 02: Start NRPE Service:
Reboot nrpe once to read new configuration, Also configure nrpe to auto start on system boot.
service nrpe start
chkconfig nrpe on
Step 03: Test NRPE from Nagios server
Login to Nagios server and run the following command. On successful connection it will print the version of nrpe package.
/usr/local/nagios/libexec/check_nrpe -H 10.132.224.168
NRPE v2.15
Need personal assistance on Nagios? Please contact me at

immukesh72@gmail.com

at very nominal charges

How to Install Nagios on RHEL,CentOS or Fedora Linux Operating System.

In this tutorial i will tell you how to install Nagios Core 4.1.1 and Nagios Plugins 2.1.1 on RHEL Linux server. Following all steps were performed and tested on RHEL 7.3 Linux Server.

Step 01 : Disable SELinux
Disable the SELinux by running the following command with root user.
$ setenforce 0
Basically this a security feature of the Linux kernel. It is designed to protect the server against misconfigurations and/or compromised daemons.

Note: setenforce is a command line utility that is used to switch the mode SELinux is running in from enforcing to permissive and vice versa without requiring a reboot.

Modify /etc/selinux/config and change enforcing to disabled
Need personal assistance on Nagios? Please contact me at

immukesh72@gmail.com

at very nominal charges

Step 02: Install the required packages
Make sure you have installed the following packages on your Linux system before continuing.
Apache 2
PHP
GCC compiler and development libraries
GD development libraries

If you did not install then please run the following commands:

sudo yum install httpd php php-cli gcc glibc glibc-common gd gd-devel net-snmp openssl-devel wget unzip -y
Note:
GCC compiler and development libraries :
GNU Compiler Collection. gcc, formerly known as the GNU C Compiler, compiles multiple languages (C, C++, Objective-C, Ada, FORTRAN, and Java) to machine code.

GD development libraries :
The GD library is a graphics drawing library that provides tools for manipulating image data. In Shopp, the GD library is used to process images for generating gallery preview and thumbnail size images automatically.

net-snmp:
Simple Network Management Protocol (SNMP) is a widely used protocol for monitoring the health and welfare of network equipment (eg. routers), computer equipment and even devices like UPSs.
And helps Nagios for notification emails.

openssl-devel:
OpenSSL is a toolkit for the Transport Layer Security (TLS) and Secure Sockets Layer (SSL) protocols. It is also a general-purpose cryptography library.

php-cli : PHP Command Line Interface

Step 03: Create Account Information
Create the Nagios user
  useradd nagios
Create a new nagcmd group for allowing external commands to be submitted through the web interface.
  groupadd nagcmd
Add both the nagios user and the apache user to the group nagcmd.
  usermod -a -G nagcmd nagios
  usermod -a -G nagcmd apache
Where :
The usermod command modifies the system account files to reflect the changes that are specified on the command line.
-a, --append
           Add the user to the supplementary group(s). Use only with the -G option.

-G, --groups GROUP1[,GROUP2,...[,GROUPN]]]
           A list of supplementary groups which the user is also a member of.
         
Step 04: Download and Install Nagios
Run the following commands to download and extract Nagios and Nagios plugins in /tmp directory.
cd /tmp

wget https://assets.nagios.com/downloads/nagioscore/releases/nagios-4.1.1.tar.gz

wget http://www.nagios-plugins.org/download/nagios-plugins-2.1.1.tar.gz

tar zxf nagios-4.1.1.tar.gz

tar zxf nagios-plugins-2.1.1.tar.gz
Go to nagios-4.1.1 directory and start compiling Nagios.
    cd nagios-4.1.1

Run the Nagios configure script, passing the name of the group you created earlier like so:
./configure --with-command-group=nagcmd
Compile the Nagios source code.
make all
Install binaries, init script, sample config files and set permissions on the external command directory.
make install
make install-init
make install-config
make install-commandmode
Configure the Web Interface
make install-webconf
Same way install the Nagios plugin as well.
cd /tmp/nagios-plugins-2.1.1

./configure --with-nagios-user=nagios --with-nagios-group=nagios --with-openssl

make all

make install
Step 05: Creating a password for nagiosadmin
We now need to create a password for the nagiosadmin user. This will be used to login to your core web GUI.
htpasswd -c /usr/local/nagios/etc/htpasswd.users nagiosadmin

Step 06: Start Nagios and Apache server
service httpd start
service nagios start (or) /etc/init.d/nagios start
Step 07: Login to the Web Interface
Enter the following url into the browser, replace your public IP of nagios server. It will ask to enter username and password. In this configuration we have username as nagiosadmin and password also as nagiosadmin.

http://<public_ip_of_nagios_server>/nagios/

Step 08: Troubleshooting
If you cannot access the Nagios web page, it may be related to your firewall rules. The following command will open up port 80 on your Nagios Core machine.
firewall-cmd --zone=public --add-port=80/tcp --permanent
firewall-cmd --reload
If you don't have firewall-cmd then try the following rule into your iptables
iptables -A INPUT -p tcp --dport http -j ACCEPT
iptables -A INPUT -p tcp --dport https -j ACCEPT
iptables-save > /etc/sysconfig/iptables
/etc/init.d/iptables restart
If you are still unable to access the web GUI, your web server may be only listening on IPv6. Modify /etc/httpd/conf/httpd.conf
and look for the part that says 'Listen :80'. Modify it to be 'Listen 0.0.0.0:80'. Then, run service httpd restart.
Need personal assistance on Nagios? Please contact me at

immukesh72@gmail.com

at very nominal charges

Wednesday, 5 April 2017

PL/SQL Examples

PL/SQL Example:

     DECLARE
          v_productcategory VARCHAR2(20) :='Mobile Phone';
          v_itemqty PLS_INTEGER := 1000;
          v_itemprice NUMBER(7,2) DEFAULT 60.50;
          v_transactiondate DATE:= SYSDATE;
          v_billingdate TIMESTAMP := SYSTIMESTAMP;
          v_test BOOLEAN:=TRUE;
        BEGIN
          DBMS_OUTPUT.PUT_LINE(v_productcategory);
          DBMS_OUTPUT.PUT_LINE(v_transactiondate);
          DBMS_OUTPUT.PUT_LINE (v_billingdate);
          DBMS_OUTPUT.PUT_LINE ('qty ' ||v_itemqty);
          END;
         /
---------------------------------
--use of anchored variable
DECLARE
    v_studentid student.studentid%TYPE; --Mapping from database
    v_marks NUMBER(3) NOT NULL :=89;
    v_totalmarks v_marks%TYPE :=350; --mapping from previously declared variable
BEGIN
    v_studentid :='S001';
    DBMS_OUTPUT.PUT_LINE(v_studentid);
    DBMS_OUTPUT.PUT_LINE(v_marks);
    DBMS_OUTPUT.PUT_LINE(v_totalmarks);
END;
-----------------------------------------------------------------------
--Bind variable
VARIABLE g_doctorid VARCHAR2(20);
BEGIN
    :g_doctorid :='&docid';
END;
SQL> PRINT g_itemid
    G_ITEMID
    ----------------
    STN001
-----------------------------------------------------------------------
--subtitutional variable
DEFINE g_itemid ="PEN";
DECLARE
    v_itemname VARCHAR2(20) :='&g_itemid';
BEGIN
    DBMS_OUTPUT.PUT_LINE(v_itemname);
END;
/
-----------------------------------------------------------------------
--IF ,ELSIF ,ELSE EXAMPLE : to find the largest number among 3
DECLARE
    v_num1 NUMBER :='&num1';
    v_num2 v_num1%TYPE :='&num2';
    v_num3 v_num2%TYPE :='&num3';
BEGIN
    DBMS_OUTPUT.PUT_LINE('The 3 numbers are :'||v_num1||',  '||v_num2||',  '||v_num3);
    IF (v_num1 > v_num2 AND v_num1 > v_num3) THEN
        DBMS_OUTPUT.PUT_LINE(v_num1 ||' is the largest number');
    ELSIF ( v_num2 > v_num1 AND v_num2 > v_num3) THEN
        DBMS_OUTPUT.PUT_LINE(v_num2 ||' is the largest number');
    ELSE
        DBMS_OUTPUT.PUT_LINE(v_num3 ||' is the largest number');
    END IF;
END;
-----------------------------------------------------------------------
--LOOP EXAMPLE(1)

DECLARE
    v_number NUMBER(10) :=1;
BEGIN
    LOOP
        DBMS_OUTPUT.PUT_LINE('NUMBER: '||v_number);
        v_number := v_number + 1;
        EXIT WHEN v_number > 5;
    END LOOP;
END;

--LOOP EXAMPLE(2) --Numeric FOR Loop
DECLARE
    v_num NUMBER ;--declaration is optional
BEGIN
    FOR v_price IN 1..5
    LOOP
        DBMS_OUTPUT.PUT_LINE('v_price: '||v_price);
    END LOOP;
END;

--LOOP EXAMPLE(3) --Numeric FOR Loop IN reverese

BEGIN
  FOR v_price IN REVERSE 1..5
  LOOP
    DBMS_OUTPUT.PUT_LINE('Price: '||v_price);
  END LOOP;
END;
       
--LOOP EXAMPLE(3) -- while loop
DECLARE
    v_price NUMBER(5) :=1;
BEGIN
    WHILE v_price <= 5
    LOOP
        DBMS_OUTPUT.PUT_LINE('Price: '||v_price);
        v_price := v_price + 1;
    END LOOP;
END;
--------------------------------------------------------------
--use of select statement
--fetching few columns
DECLARE
    v_hostelid hostel.hostelid%TYPE;
    v_hostelfee hostel.hostelfee%TYPE;
BEGIN
    SELECT hostelid,hostelfee INTO v_hostelid,v_hostelfee FROM hostel WHERE studentid='S001';
    DBMS_OUTPUT.PUT_LINE('hostel id :=' || v_hostelid);
    DBMS_OUTPUT.PUT_LINE('hostel fee :=' || v_hostelfee);
END;

Rules :
1.Only one row value can be returned to the variable_list
2.If no value is returned then the “No data found” exception is thrown
3.If more than one record is returned then the “Exact fetch returns more than requested number of rows” exception is thrown.


--Composite datatype : USING ROWTYPE
DECLARE
    v_hostelrec hostel%ROWTYPE;
BEGIN
    v_hostelrec.studentid :='&hostelid';
    SELECT * INTO v_hostelrec FROM hostel WHERE studentid=v_hostelrec.studentid;
    DBMS_OUTPUT.PUT_LINE('hostel id :=' || v_hostelrec.hostelid);
    DBMS_OUTPUT.PUT_LINE('room no :=' || v_hostelrec.roomno);
    DBMS_OUTPUT.PUT_LINE('student id :=' || v_hostelrec.studentid);
    DBMS_OUTPUT.PUT_LINE('hostel fee :=' || v_hostelrec.hostelfee);
END;

--------------------------------------------------------------------------------------------------------
--Using SQL INSERT in PL/SQL 
--Can’t I write a insert statement as shown below to insert the record into the supplier table?
--yes we can insert
    INSERT INTO supplier(supplierid, suppliername, suppliercontactNo ) 
                                                VALUES ('&supplierid', '&suppliername', '&suppliercontactno');

--UPDATE
 BEGIN
   UPDATE supplier SET suppliercontactno = '0012244' WHERE supplierid='S001';
 END;
Write a PL/SQL block to insert the values from user.

--Using SQL DELETE in PL/SQL
BEGIN
  DELETE FROM supplier WHERE supplierid='S001';
END;

---------------------------------------------------------------------------
                      --PREDEFINED EXCEPTION--
---------------------------------------------------------------------------
--Predefined Oracle Server Exception
ORA-1403    NO_DATA_FOUND         SELECT statement matches no rows
ORA-1422    TOO_MANY_ROWS         SELECT statement matches more than one rows
ORA-0001    DUP_VAL_ON_INDEX      Uniq constraints voilated
ORA-1476    ZERO_DIVIDE           Division by zero
ORA-6502    VALUE_ERROR           Truncation,arithmetic error
ORA-1722    INVALID_NUMBER        Conversion to the number failed ex.2A is not valid

--NO_DATA_FOUND - Predefined Exception
DECLARE
    v_hostelid hostel.hostelid%TYPE;
    v_hostelfee hostel.hostelfee%TYPE;
    v_studentid hostel.studentid%TYPE;
BEGIN
    v_studentid :='&stdid';
    SELECT hostelid,hostelfee INTO v_hostelid,v_hostelfee FROM hostel WHERE studentid=v_studentid;
    DBMS_OUTPUT.PUT_LINE('hostel id :=' || v_hostelid);
    DBMS_OUTPUT.PUT_LINE('hostel fee :=' || v_hostelfee);
EXCEPTION
    WHEN NO_DATA_FOUND THEN
        DBMS_OUTPUT.PUT_LINE('STUDENT IS NOT EXIST');
    WHEN VALUE_ERROR THEN
        DBMS_OUTPUT.PUT_LINE('STUDENT ID IS TOO LARGE');
END;
/

--If the input entered is very large, truncation happens resulting in value error
--INVALID_NUMBER predefined exception
--Inserting a record to billing table As ‘X’ a character value cannot be converted to integer value for billno an INVALID_NUMBER exception is thrown

----------------------------------------------------------------------------------------------
                                --NON-PREDEFINED EXCEPTION
----------------------------------------------------------------------------------------------
--USE OF PRAGMA EXCEPTION_INIT

DECLARE
    e_MissingNull Exception;
    PRAGMA EXCEPTION_INIT(e_MissingNull,-1400);
BEGIN
    INSERT INTO applicant (applicantid) VALUES (NULL);
EXCEPTION
    WHEN e_MissingNull THEN
    DBMS_OUTPUT.PUT_LINE('NULL VALUE CANT INSERT');
END;
/

--User-defined Exception
--Given an invalid itemid display appropriate error message If the given itemid is invalid, display Invalid Itemid
SET VERIFY OFF
SET SERVEROUTPUT ON
DECLARE
    v_studentid hostel.studentid%TYPE;
    v_count NUMBER;
    e_Invalid_Studentid EXCEPTION;
BEGIN
    v_studentid :='&studentid';
    SELECT count(*) INTO v_count FROM hostel WHERE studentid=v_studentid;
    IF v_count = 0 THEN
        RAISE e_Invalid_Studentid;
    END IF;
        DBMS_OUTPUT.PUT_LINE('Valid student_d');
EXCEPTION
        WHEN e_Invalid_Studentid THEN
        DBMS_OUTPUT.PUT_LINE('invalid student id');
END;
/

--NOTE : exception can be raise in the DECLARATIVE,EXECUTABLE and EXCEPTION section
Related Posts Plugin for WordPress, Blogger...